
This guide moves an existing Laravel app that uses MySQL to a FlyNode Cloud Workspace. The app runs as a Custom app built from your Git repository. The database stays on a MySQL host you choose and the app reaches it through the usual DB_* variables.
How the pieces fit
- Laravel app: one Custom app. FlyNode builds your repository with Nixpacks, which recognises a Laravel project, runs
composer installand your front-end build, and serves the app with nginx and PHP-FPM on a generated address with automatic SSL. - MySQL: a managed MySQL service or a server you already run. Apps on FlyNode cannot reach each other's databases, so the app connects to the database by its normal address. A Custom app does not start a MySQL of its own.
- Not included: queue workers and the scheduler are separate processes. This app serves web requests only, so use a queue driver and scheduler that do not need a long-running process on this container (or run them elsewhere).
Before you start
- Your code is in a repository on GitHub, GitLab or Bitbucket, and it does not contain your real
.envfile. - You know your app key (
php artisan key:generate --showprints one), your database login, and every other setting your.envholds. - For a private repository, read Deploy a Private Repository first, and see the note in step 3.
Step 1: Get the code ready
- Trust the proxy. FlyNode serves your app over HTTPS in front of the container. Without trusting the proxy, Laravel builds
http://links for your CSS and JavaScript and the browser blocks them, so the page loads with no styling. In Laravel 11 and 12, add this tobootstrap/app.php:
If you cannot change the code yet, set the->withMiddleware(function (Middleware $middleware) { $middleware->trustProxies(at: '*'); })APP_URLandASSET_URLvariables to yourhttps://address (step 4). We tested that this makes the CSS and JavaScript load. - Keep files out of the container. A deploy builds a new container, so files written to
storageat run time are not kept. Use S3 or another object store for uploads. - Sessions and cache. If your app uses the database for sessions or cache, those tables must exist in the new database before the first visit (step 2).
Step 2: Move the database
- Create a MySQL database at your provider. Note its host, port, name, user and password. Most managed services require SSL, so keep the connection option your provider documents.
- If the provider limits which addresses may connect, allow your FlyNode server. If a connection is refused later, check this first.
- On your own computer, take a dump of the old database:
mysqldump --single-transaction --routines --triggers -u USER -p OLD_DB > dump.sql. - Load it into the new one:
mysql -h NEW_HOST -u NEW_USER -p NEW_DB < dump.sql. - Check a few table row counts in both databases before you switch.
Step 3: Deploy the app
- Go to Deploy and choose Custom app.
- Enter an app name, choose Public repository or Private repository, paste the repository address and check the branch.
- Leave Advanced build options alone. FlyNode detects Laravel on its own.
- Press Continue, keep the generated domain, press Continue again and then Deploy App.
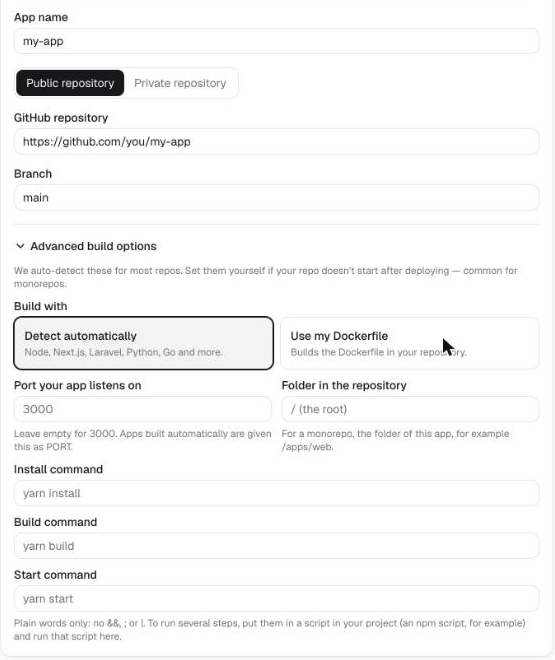
Laravel on a private repository. For a public GitHub repository FlyNode sets one extra variable for you,
NIXPACKS_START_CMD, which you will see in the Variables list. It works around a known problem where the web server never starts for Laravel projects (the log showsnginx: [emerg] duplicate location "/"). FlyNode cannot look inside a private repository to see that it is Laravel, so for a private one add the variable yourself: in Settings, Variables addNIXPACKS_START_CMDwith this value, then press Save and redeploy:env -u NIXPACKS_PHP_FALLBACK_PATH node /assets/scripts/prestart.mjs /assets/nginx.template.conf /nginx.conf && (php-fpm -y /assets/php-fpm.conf & nginx -c /nginx.conf)
Step 4: Add your variables
Open the app, go to Settings and then Variables. Use Paste a .env to add everything at once, then press Save and redeploy. These are the ones most Laravel apps need:
APP_KEY,APP_ENV=production,APP_DEBUG=falseAPP_URLandASSET_URL, both set to yourhttps://addressDB_CONNECTION=mysql,DB_HOST,DB_PORT,DB_DATABASE,DB_USERNAME,DB_PASSWORDSESSION_DRIVERandCACHE_STORE(for examplefile, ordatabaseonce the tables exist)
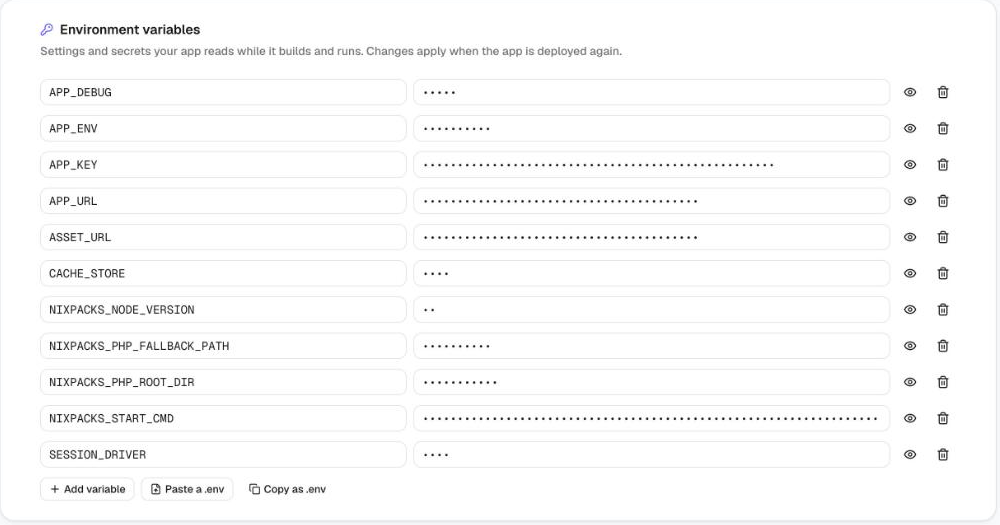
Values stay hidden until you press the eye icon. A variable is read when the app starts, so nothing takes effect until the app is deployed again. See Build Logs, Environment Variables and Rollback.
Step 5: Run your migrations
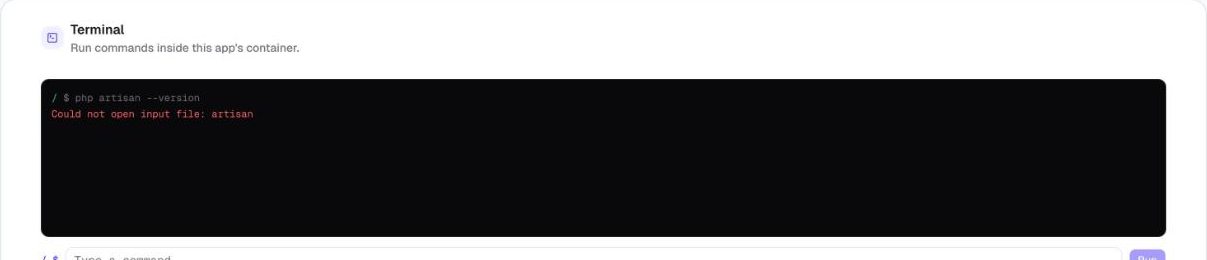
If the database you moved already holds your tables, you can skip this. To run migrations, open the Terminal tab. It opens in the root folder, and your project is in /app, so run cd /app first and then php artisan migrate --force. A command is stopped after 15 seconds, so this is meant for small jobs.
Step 6: Check that it works
- Settings, then Deploys shows the build as Succeeded. If it failed, press View log.
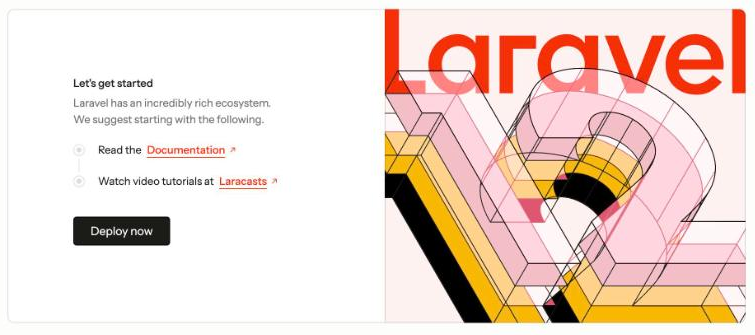
- Open the app's address. A fresh Laravel project shows its welcome page.
Then sign in and open a page that reads from MySQL. Add your own domain from the Custom Domain tab (see Custom Domains for Your Apps) and update APP_URL and ASSET_URL to it.
If something goes wrong
- The page shows a plain 500 error. Most often the
APP_KEYis missing, or the database is unreachable. Open the Logs tab, and setAPP_DEBUG=truefor a moment (then redeploy) if you need the full message. Turn it off again afterwards. - The page loads with no styling. Your CSS and JavaScript are requested over
http://. Trust the proxy (step 1) or setASSET_URLto yourhttps://address. - The address shows "no available server". The web server did not start. Read the Logs tab. If you see
duplicate location "/", add theNIXPACKS_START_CMDvariable from the note in step 3. - The database refuses the connection. Check the host, port and password, SSL if your provider requires it, and whether the provider restricts which addresses may connect.
- Front-end build errors. Open Deploys and press View log. Make sure
package.jsonhas abuildscript that works on your own computer.
Next steps
- Deploy a Private Repository and redeploy on every push.
- Migrate a Next.js App and Its Postgres Database to FlyNode.
Still stuck?
Open a support ticket from your dashboard and include the container name.